7 Essential Steps to Install a Fire Pit Liner
The smell of damp earth and the crisp turgor of a healthy leaf define the perimeter of a well managed landscape. When integrating a permanent heat source into a living ecosystem, the structural integrity of the site is paramount to prevent root desiccation or soil sterilization. Learning the precise steps to install a fire pit liner ensures that thermal energy is contained, protecting the surrounding rhizosphere from extreme temperature fluctuations. A properly installed steel or masonry insert acts as a thermal barrier, preserving the delicate balance of soil microbes and preventing the lateral spread of heat into the root zones of nearby specimens.
Materials:

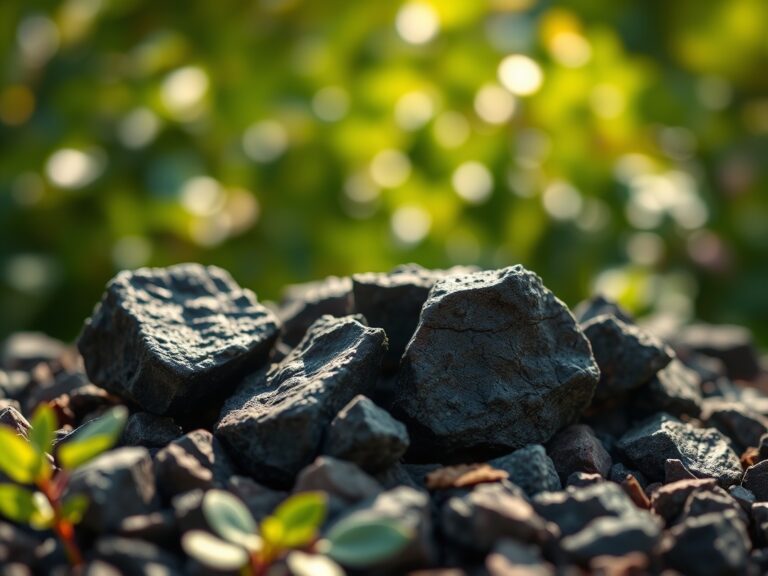
The foundation of any hardscape project must account for the Cation Exchange Capacity (CEC) of the underlying substrate. For this installation, the surrounding soil should ideally be a friable loam with a pH between 6.0 and 7.0 to support post-construction recovery of turfgrass. You will require high-grade corrugated or smooth steel liners, 12 inches of 3/4-inch crushed angular stone for drainage, and a leveling base of coarse sand. Avoid heavy clays with low porosity, as these trap moisture against the metal, accelerating oxidation. If the site soil is depleted, amend the perimeter with a 10-10-10 NPK ratio fertilizer to stimulate vegetative growth once the installation is complete.
Timing:
Installation should occur during the dormant season or early spring to minimize compaction of the soil profile when water content is manageable. In Hardiness Zones 5 through 7, aim for the window between the first hard frost and the spring thaw. This timing respects the biological clock of the surrounding flora; plants are in a state of senescence and lack the high turgor pressure found during active spring growth. By installing before the transition from vegetative to reproductive stages, you avoid disrupting the peak nutrient uptake period of the landscape.
Phases:

Sowing the Foundation
Excavate a circular area 12 inches wider than the diameter of your liner. The depth must reach at least 8 inches below the finished grade to allow for a proper drainage sump. Remove all organic matter and large root structures to prevent future subterranean combustion or localized nitrogen drawdown as the wood decays.
Pro-Tip: Removing organic debris prevents the "priming effect," where a sudden influx of oxygen and heat accelerates microbial decomposition, leading to localized soil subsidence.
Transplanting the Liner
Place the steel liner into the center of the pit. Ensure it sits level by using a 4 foot carpenter level across the rim. The top edge of the liner should sit 2 inches above the final grade to prevent surface runoff from flooding the pit and anaerobic conditions from forming at the base.
Pro-Tip: Maintaining a 2-inch lip prevents "hydrostatic pressure" from forcing sediment-heavy water into the pit, which would otherwise clog the drainage stone and suffocate the soil interface.
Establishing the Thermal Barrier
Fill the exterior gap between the liner and the soil wall with crushed stone. This creates a "thermal break" that protects the surrounding soil's mycorrhizal symbiosis. The stone allows for rapid gas exchange and prevents heat from baking the soil into an impermeable brick.
Pro-Tip: This stone layer facilitates "oxygen diffusion," ensuring that beneficial aerobic bacteria in the nearby soil do not perish from the high-heat, low-oxygen environment created by the fire.
The Clinic:
Physiological disorders in the surrounding landscape often manifest after a poor installation. Monitor for these specific symptoms:
- Symptom: Leaf Scorch. Edges of nearby foliage turn brown and brittle.
Solution: Increase the thermal barrier width. The heat is radiating too far into the canopy. - Symptom: Stunted Growth. Plants near the pit show reduced internode length.
Solution: Check for soil compaction. Use a broadfork to aerate the soil 3 feet from the pit edge. - Symptom: Nitrogen Chlorosis. Older leaves turn pale yellow while veins remain green.
Fix-It: Apply a water-soluble high-nitrogen fertilizer (NPK 20-10-10) to compensate for carbon-heavy mulch breakdown near the heat source. - Symptom: Iron Deficiency. New growth is yellow with green veins (interveinal chlorosis).
Fix-It: Lower the soil pH using elemental sulfur if the stone base has leached lime into the soil.
Maintenance:
Post-installation care requires hyper-specific moisture management. Use a soil moisture meter to ensure the area within a 5-foot radius of the pit receives 1.5 inches of water per week at the drip line. Use a hori-hori knife to check for soil compaction monthly; if the blade cannot penetrate 4 inches easily, the soil is too dense for gas exchange. Prune any overhanging branches using bypass pruners to maintain a 10-foot vertical clearance, preventing heat-induced senescence of the upper canopy. Clean the liner of ash after every three uses to prevent highly alkaline lye from leaching into the soil during rain events.
The Yield:
While a fire pit does not produce a harvest, the "yield" is the sustained health of the surrounding ecosystem. To ensure the area remains viable for future plantings, monitor the soil temperature 12 inches from the liner during use. If temperatures exceed 110 degrees Fahrenheit at a 3-inch depth, the thermal barrier is insufficient. Maintaining a cool rhizosphere ensures that the "day-one" freshness of your ornamental plants is preserved throughout the peak summer burning season.
FAQ:
How deep should I dig for a fire pit liner?
Excavate to a depth of 12 inches. This allows for 8 inches of crushed stone for drainage and 4 inches for the liner base. Proper depth prevents frost heave and ensures structural stability in various soil types.
What is the best material for a fire pit liner?
Heavy-gauge carbon steel or stainless steel is ideal. These materials withstand high thermal expansion without warping. Ensure the steel is at least 10-gauge thickness to prevent premature oxidation and structural failure over multiple seasons.
Do I need a liner if I have fire bricks?
Yes. A steel liner provides a uniform thermal shield that fire bricks alone cannot achieve. The liner prevents heat from escaping through small gaps in the masonry, which protects the surrounding soil from sterilization.
How do I prevent the liner from rusting?
Apply a high-heat resistant paint rated for 1,200 degrees Fahrenheit. Additionally, ensure the drainage layer of 3/4-inch stone is clear of debris. This prevents moisture from sitting against the metal and initiating the oxidation process.